How to Reduce Echo in Home Office Setups: A Practical Guide
Jump to section
You sit down for an important team presentation, turn on your microphone, and speak. Instantly, your voice bounces off the bare walls, creating a hollow, ringing tail that sounds like you are sitting inside a tiled bathroom or an empty shipping container. Colleagues ask if you are on speakerphone, and software noise suppression struggles to strip away the lingering room reverb without making your voice sound robotic.
If this scenario sounds familiar, learning how to reduce echo in home office spaces is one of the single most effective upgrades you can make to your daily workflow. Excessive reverberation does not just make video calls sound unprofessional; it creates listener fatigue for everyone on the other end of the line. Fortunately, taming audio reflections does not require turning your workspace into a commercial recording booth or spending thousands on architectural renovations.
How to reduce echo in home office: Soundproofing vs. Acoustic Treatment: Understanding the Science of Reverb
Before buying materials or hanging panels, it is helpful to clarify a common point of confusion: soundproofing and acoustic treatment are two entirely different problems that require completely different solutions.
Soundproofing (acoustic isolation) aims to block sound from traveling into or out of a room. Stopping the noise of a neighbor's lawnmower, street traffic, or barking dogs requires adding physical mass and structural decoupling—such as double drywall, heavy solid-core doors, and mass-loaded vinyl inside walls. Acoustic panels will not prevent outside noise from entering your room.
Acoustic treatment, on the other hand, manages sound waves that are already inside your room. When you speak, sound waves travel outward from your mouth and collide with hard, non-porous surfaces like drywall, glass windows, hardwood floors, and laminate desk tops. These rigid surfaces act like acoustic mirrors, bouncing the energy straight back into the room. When hundreds of these reflections overlap in a small space, you get echo—technically referred to as reverberation.
The 20% to 30% Surface Area Rule
You do not need to cover every square inch of your walls with sound-absorbing material to achieve clear audio. In fact, over-treating a room makes the space feel unnaturally "dead," uncomfortable for normal conversation, and visually claustrophobic. Treating roughly 20% to 30% of a room's total hard surface area is usually enough to eliminate harsh echoes and keep speech natural and intelligible.
How to Reduce Echo in Home Office Workspaces with Soft Furnishings ($0–$60)
If you want to solve an echo problem without buying specialized acoustic gear, look at the soft materials already present in your home. The primary objective is replacing reflective hard planes with dense, porous textures that absorb sound wave kinetic energy.
Floors and Windows
Hardwood, tile, and laminate flooring are prime culprits for harsh floor-to-ceiling echo. Placing a plush, high-pile area rug beneath your desk and office chair instantly tames a massive surface area of reflection. For maximum absorption, pair the rug with a dense felt rug pad underneath.
Large bare glass windows reflect high-frequency sound energy almost as efficiently as concrete. Replacing thin mini-blinds with thick velvet or multi-layer blackout drapes softens reflections considerably. Even when kept open during the workday, heavy fabric gathered at the sides of window frames breaks up side-wall audio bouncing.
Desk Surface and Quick Hacks
Large wooden or glass desktops create immediate "tabletop reflections" that bounce straight up into your microphone. Adding an oversized felt desk pad under your keyboard and mouse absorbs these micro-reflections while improving mouse tracking comfort. If you are stocking up on basic workspace upgrades, sensible choices like felt pads offer practical multi-use benefits; see our guide on smart sourcing retail office supplies for budget-friendly recommendations.
For an immediate zero-cost fix ahead of an unexpected video interview, drape a heavy plush blanket or bath towel over the hard furniture edge directly behind your monitor, or lay a thick blanket on the bare floor just out of camera view. While temporary, this soft barrier swallows immediate front-facing reflections during critical calls.
Targeted Wall Placement: Finding First Reflection Points
Randomly hanging acoustic tiles on walls yields disappointing results. To maximize the impact of every panel you install, you need to target "first reflection points"—the specific spots on your walls where sound waves hit first after leaving your mouth before bouncing directly into your microphone or ears.
The Mirror Technique
Finding first reflection points is straightforward if you have a second person to help:
- Sit in your standard work position at your desk facing your monitor.
- Have a partner hold a small flat mirror flat against the wall at eye level and slide it along the side wall.
- Look in the mirror from your seated position. The moment you can see the reflection of your microphone or face in the mirror, mark that wall location with a small piece of painter's tape.
- Repeat this process along both side walls, as well as the wall directly behind your computer display.
These marked zones are your primary reflection points. Prioritize placing sound treatment over these spots first before covering secondary areas.
Rental-Friendly Mounting Methods
If you rent your home or prefer not to damage drywall with strong spray adhesives, avoid gluing panels directly to walls. Instead, mount lightweight PET felt or foam panels onto thin, rigid backing boards made from corrugated plastic or cardboard. Secure the backing boards to your wall using heavy-duty Command picture hanging strips or small finish nails. When it comes time to move or reconfigure your layout, the strips pull away cleanly without ripping off wall paint.
Choosing Acoustic Panels: Foam, PET Felt, Wood Slats, and Fiberglass
Not all acoustic treatments perform equally. Different materials absorb distinct frequency ranges, and picking the right product depends on your budget, sound needs, and room aesthetics.
Entry-Level Polyurethane Foam ($25–$80)
Lightweight foam tiles (often sold in 12-packs of 12"x12" wedge or egg-crate shapes) are widely available online. While inexpensive, polyurethane foam has very low density. It effectively dampens high-frequency harshness—such as sharp hand claps or key clicks—but does little to absorb low-mid frequencies where human speech resonance resides (roughly 200 Hz to 500 Hz). They are acceptable for tight budgets, but require significant wall coverage to show noticeable speech improvements.
High-Density PET Felt Tiles ($30–$100)
Manufactured from compressed polyester fibers (often derived from recycled plastic bottles), PET felt tiles offer a clean, modern aesthetic. Because PET tiles have a much higher material density than open-cell polyurethane foam, thin 1/2-inch or 1-inch panels provide superior speech-range absorption while maintaining a sleek profile that blends easily into contemporary home office decor.
Mid-Range Decorative Wood Slat Panels ($100–$350)
Acoustic wood slat panels (such as those from WoodUpp or IKEA's MITTZON acoustic series) feature thin wood veneer slats mounted over a thick black PET felt backing layer. These panels combine visual warmth with functional dual performance: the felt backing absorbs sound waves, while the linear wood slats scatter remaining audio energy. They serve as stunning accent walls behind webcams while dramatically reducing room flutter.
Pro-Grade Fiberglass and Rockwool Panels ($250–$800+)
Rigid mineral wool or fiberglass panels wrapped in breathable fabric (such as options from GIK Acoustics or Primacoustic) represent the gold standard in room acoustics. A two-inch-thick rockwool panel offers near-complete absorption across human speech frequencies. While pricier and heavier to mount, installing just two or three pro-grade panels at primary reflection points often yields better results than covering an entire wall in low-density foam.
Diffusion and Furniture: Turning Bookshelves into Acoustic Tools
Acoustic management is not exclusively about absorption. Sound treatment also relies on diffusion—the scattering of sound waves. Rather than sucking audio energy out of the room, diffusers break up solid reflection beams and distribute them evenly across the space, keeping the room sounding natural while preventing direct slapback echo.
The Bookshelf Diffuser
You can create an effective sound diffuser using standard office furniture. An open wooden bookshelf placed along the back wall behind your desk makes a fantastic acoustic scattering tool. To optimize it:
- >
- Avoid lining up book spines in a perfectly flat line. Stagger hardcovers and paperbacks at varying depths along the shelves.
- Mix books with irregular decorative objects, small storage boxes, and framed art.
- Leave small pockets of open space between clusters of items.
When sound waves from your voice hit this uneven surface, they bounce off at multiple varied angles and time delays rather than reflecting back toward your microphone in a single coherent wave.
The Truth About House Plants
It is a popular internet myth that adding leafy indoor plants eliminates room echo. While large plants with thick foliage provide minor high-frequency scattering, leaves lack the physical density required to absorb speech-range frequencies. Enjoy houseplants for air feel and aesthetics, but rely on heavy fabrics, felt, or acoustic panels for audio control.
Microphone Positioning and Desktop Tweaks for Maximum Voice Clarity
Even in a reflective room, strategic audio gear placement can bypass much of the echo before it ever reaches your software. Understanding the relationship between sound source distance and ambient room pickup makes a massive difference in speech clarity.
The Inverse Square Law and Mic Distance
If your microphone sits two feet away on your desk next to your monitor, it has to turn its input gain up high to pick up your voice. In doing so, it picks up room echo with almost the same volume as your direct voice. By mounting a dynamic or cardioid condenser microphone on an adjustable boom arm and positioning it just 6 to 8 inches from your mouth, your direct voice becomes significantly louder than ambient room reflections. You can then lower the overall input gain, letting the microphone capture clean, intimate speech while ignoring distant wall reverberation.
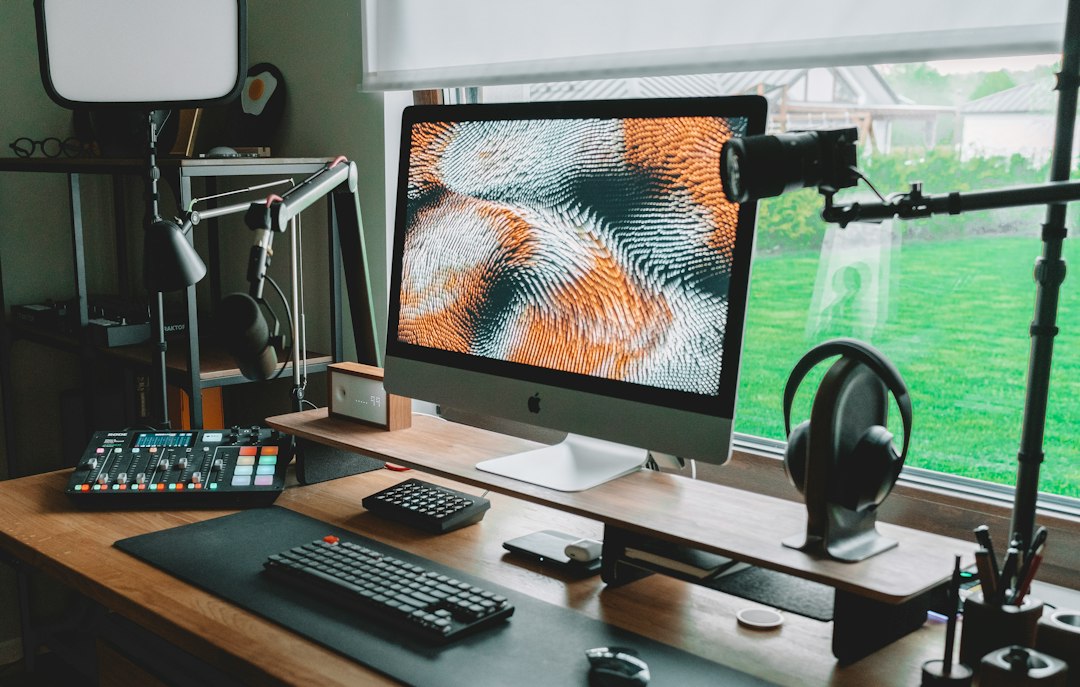
If you are reconfiguring a compact desk layout to fit a boom arm and acoustic treatments, reviewing small space home office ideas can help you integrate mounting accessories without cluttering your work surface.
Practical Echo Reduction Sequence
To systematically eliminate echo from your home office, follow this sequential setup checklist:
- Audit hard room surfaces by standing in your seated position and clapping once sharply to listen for ringing flutter echo.
- Lay down a dense area rug with a felt pad underneath to cover hard floor space near your desk.
- Hang heavy curtains or blackout drapes over bare windows to stop high-frequency glass reflections.
- Add an oversized felt desk pad under your keyboard and mouse to absorb desktop slapback.
- Identify first reflection points on side walls and front walls using the mirror technique.
- Mount PET felt, slat panels, or fiberglass acoustic panels at marked first reflection points using damage-free Command strips or hanging hardware.
- Stagger books and objects on open shelves behind your desk position to create natural diffusion.
- Mount your microphone on a boom arm positioned 6 to 8 inches from your mouth and lower the input gain.
For more advice on keeping your workspace tidy as you add boom arms, microphone cables, and acoustic equipment, see our step-by-step guide to desk cable management essentials.
By combining soft furnishings, targeted acoustic panels, and smart microphone technique, you can eliminate frustrating room reverb completely. The result is a quiet, comfortable space where your voice comes through clearly and naturally on every call.
Keep reading
Related Articles
How to Choose Home Office Lighting for Video Calls and Reduced Eye Strain
Learn how to balance key lighting, color temperature, and ambient light to look clear on camera while reducing visual fatigue during long remote workdays.
Smart Home Office Automation Ideas for Daily Work Routines
Streamline your remote workday with practical smart home office automation ideas that cut friction, boost daily focus, and enforce healthy work-life boundaries.
Small Closet Desk Build: How to Convert a Closet into a Functional Cloffice Setup
Transform an unused reach-in closet into an ergonomic, space-saving cloffice. Learn how to plan dimensions, mount floating desktops, route power, and optimize lighting.